
Make a Flyer in Google Docs with 1-Click Publishing
Searching for the easiest way to make a flyer in Google Docs and send it straight to your WordPress blog without mess? With Wordable’s Google Docs to WordPress integration, you can design, format, and publish stunning flyers in seconds. Get Started with Wordable Today and eliminate manual copy-and-paste headaches.
Why Use Google Docs to Make a Flyer
Google Docs offers flexible templates, real-time collaboration, and cloud-based access—all free. Whether you’re working solo or coordinating with a team, you can craft attention-grabbing flyers with ease. And when it’s time to publish, you won’t have to wrestle with WordPress formatting thanks to one-click publishing.
Step 1. Design Your Flyer in Google Docs
Begin by opening Google Docs and selecting a blank document or one of the built-in flyer templates. Customize page size, margins, and orientation to suit your needs:
- Set orientation to Portrait or Landscape under File → Page setup
- Insert a table or use text boxes to arrange headers, images, and body text
- Choose bold, readable fonts like Montserrat or Open Sans for headlines
- Apply brand colors using the text and shape fill options
Collaborate by sharing your draft with team members, collecting feedback via comments, and resolving edits—all within the same document.
Step 2. Prepare Your Images and Layout
High-quality visuals make your flyer pop. In Google Docs:
- Insert images with Insert → Image, then drag-resize to fit your layout
- Add alt text for accessibility by right-clicking the image and choosing Alt text
- Compress large files in advance via an external tool or let Wordable optimize them on export
Ensure all text is final, comments are resolved, and any links point to the correct landing pages before moving on.
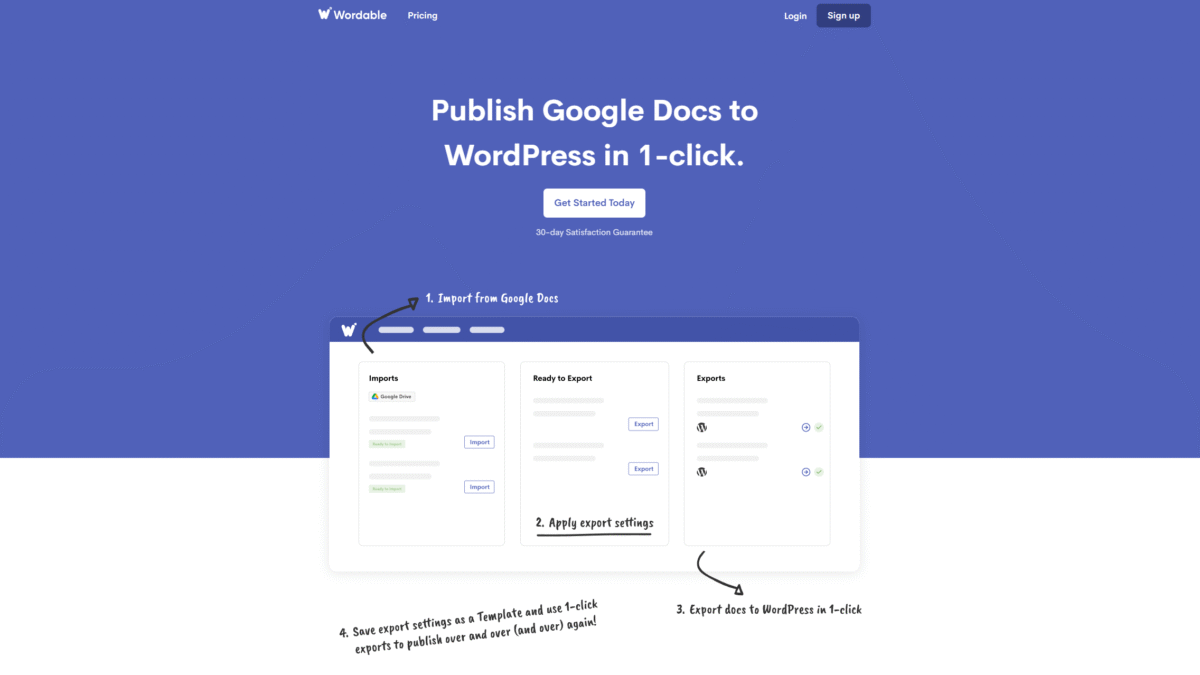
Step 3. Automate Publishing with Wordable
Connecting Google Docs to WordPress normally takes hours of cleanup in the editor. Wordable slashes that time to seconds:
- Open the Wordable add-on in Google Docs and authorize access to your WordPress site.
- Under Connections, select your target blog and configure export settings.
- Enable options for automatic image alt text, new-tab links, and on-the-fly image compression.
- Click Export Now and watch your flyer appear in the WordPress editor—fully formatted and ready for publishing.
This streamlined workflow means you never lose formatting, and you reclaim hours you’d otherwise spend fixing HTML. Get Started with Wordable Today and experience true one-click publishing.
Key Benefits of One-Click Publishing
- Zero formatting errors: Wordable strips messy HTML and preserves your design.
- Automatic alt text: Improves accessibility and SEO.
- Image compression: Keeps page load speeds high without sacrificing quality.
- Save hundreds of hours: Eliminate repetitive copy-paste and manual edits.
- Consistent branding: Your fonts, colors, and layouts remain intact.
Tips for an Eye-Catching Flyer
- Focus on hierarchy: Use large headlines and subheads to guide the reader’s eye.
- Limit text: Keep it concise—aim for a single, clear call to action.
- High-contrast colors: Ensure readability, especially on mobile.
- Whitespace: Don’t overcrowd—let key elements breathe.
- Clickable links: If you plan to share digitally, embed hyperlinks in text or buttons.
Conclusion
When you need to make a flyer in Google Docs and get it live on your blog in seconds, Wordable transforms your process. Skip the tedious editor fixes and let Wordable handle formatting, alt text, and image optimization. Ready to publish without pain? Get Started with Wordable Today.